
Unlock the Power of Google Chrome's Built-in Translation: A Comprehensive Guide
This guide provides a step-by-step walkthrough on how to effortlessly translate web pages using Google Chrome's powerful translation features. Learn to translate entire pages, selected text, and customize your translation settings for a seamless multilingual browsing experience.
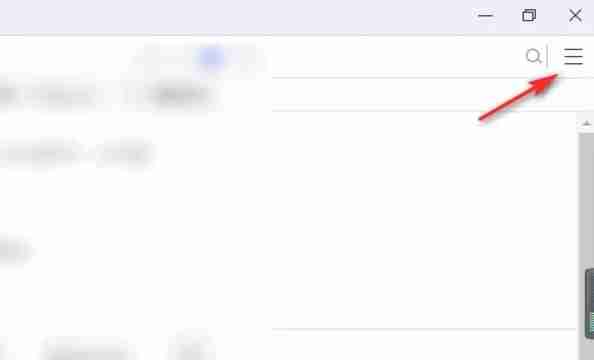
Step 1: Accessing the Settings Menu
Locate and click the Chrome menu button in the upper right-hand corner of your browser window. This button usually appears as three vertical dots or three horizontal lines.
Step 2: Navigating to Settings
In the dropdown menu that appears, select "Settings." This will open your browser's settings page.

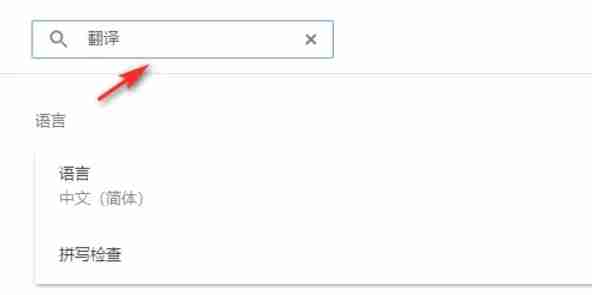
Step 3: Locating Translation Settings
At the top of the Settings page, you'll find a search bar. Enter "Translate" or "Language" to quickly find the relevant settings.
Step 4: Accessing Language Settings
Once you've located the translation settings, you'll see an option labeled "Languages" or similar. Click on this option.
Step 5: Managing Languages
The language settings page will display a list of languages supported by your browser. You can add new languages, remove existing ones, or manage their order of preference.

Step 6: Enabling Automatic Translation
On this page, locate the setting typically titled "Offer to translate pages that aren't in a language you read." Ensure this option is enabled. This will prompt Chrome to automatically offer translation for web pages written in languages other than your browser's default language.
By following these steps, you can harness the power of Google Chrome's translation capabilities and enjoy a truly global browsing experience.


![Aliens in the Backyard [v18]](https://img.icssh.com/uploads/24/1719555293667e54ddbb944.jpg)


![City Devil: Restart [v0.2]](https://img.icssh.com/uploads/38/1719554737667e52b102f12.jpg)